They say not to count your eggs before they hatch – but if you don’t know how to hatch your own chicken eggs, how can you be expected to count them?
That’s just a bit of corny humor, of course, but if you raise your own chickens, whether for fun or for profit, it’s important to know how to hatch your own eggs.
Whether you’re planning on allowing Mama Hen to do all the work by becoming broody – or you intend to hatch your own eggs in an incubator – this article will tell you everything that you need to know in order to get started.
Hatching Chicken Eggs with a Broody Hen

If you want to do things the old-fashioned way, know that you don’t necessarily need an incubator in order to do it.
In fact, nature can take are of the work for you!
It’s common for hens to go broody in the early spring and summer months.
If you know that you want to hatch your own chicks, you should make sure you have a rooster who can fertilize your eggs as well as a breed of chicken that has a tendency to go broody.
While some hens are prone to broody behaviors, others will never go broody in their entire lives.
Some good breeds to consider include Buff Orpingtons and Silkies.
These breeds aren’t only good sitters, but they will also be good mothers for the chicks after they hatch.
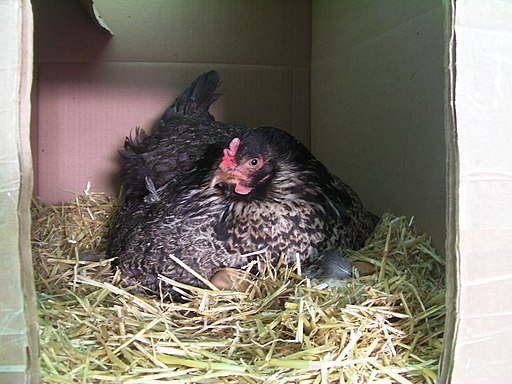
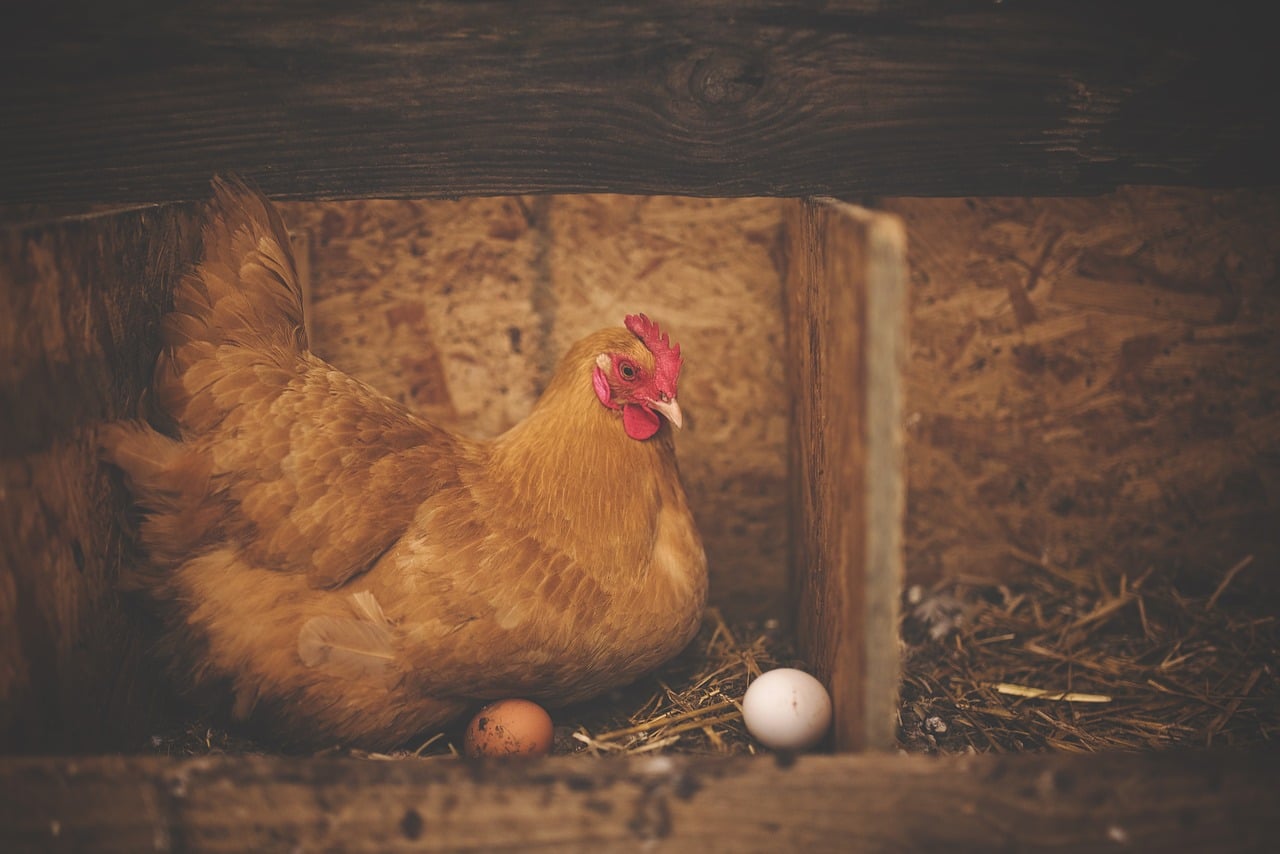
To care for a broody hen, all you need to do is allow her to sit on her eggs in the nest box.
You may need to move her to a larger nest box that provide at least one square foot of space.
This will make it easier for your broody hen to get up, reposition, and avoid stepping on the eggs.
Make sure your broody hen has access to plenty offed and water and that she is isolated from the other birds.
The other hens may try to force her off her eggs to use the nest box, so providing a separate spot for the broody mama may be your best bet.
She will be broody for quite some time – chicks take 21 days to hatch. Make sure you keep track of the date on which your hen went broody so that you know when to expect chicks, but know that there can be a variation of a couple of days or more in this timeline.
Right before the chicks are due to hatch, you may hear your hen making vocalizations to the chicks.
These will sound very low-pitched and will be different than any other noise you have heard your chickens make. You might even hear the eggs peeping back!
You do not need to do anything to help hatch eggs under a broody hen.
They will hatch on their own within one to four days – any that do not hatch after this time are probably not viable.
Know that your broody hen will likely have the instinct to sit on the eggs until they hatch, but you may need to intervene and remove the infertile eggs if that’s the case.
How to Hatch Chicken Eggs With an Incubator

There are a lot of benefits to hatching chicken eggs with a broody hen, but consistency is not one of them.
Mother hens will constantly fuss over their eggs, rarely leaving the nest except to eat, drink, or poop – until they decide to abandon the eggs altogether.
Or they accidentally step on one. Or the outside temperatures drop and the eggs can’t survive.
It can be very difficult to control for all the variables that go into hatching chicken eggs successfully.
Therefore, many modern chicken farmers use incubators to help them with the hard task of hatching healthy chicks.
If you think incubating chicken eggs might be a better choice for you, here are all the tips you need to do it successfully.
Purchase and Set Up Your Incubator
Before you can do anything else, you need to set up your incubator.
While there are plans online that will teach you how to make a “homemade, DIY” incubator for pennies, it’s not recommended that you try one of these – not unless you’re truly interested in the experiment.
These are prone to failure and it can be extremely disappointing to wait for your eggs to hatch for three weeks, only to find out that they never made it past the first few days.
Think carefully about how many eggs you want to hatch.
Egg incubators will accommodate anywhere from a dozen to more than a hundred eggs, but if you’re interested only in hatching eggs for chickens to be raised in your backyard, you probably don’t need to spend hundreds of dollars on a high-end commercial model.
One of the most common homesteader favorites is the Hova-Bator.
No matter what kind of incubator you use, know that the process will be exactly the same moving forward.
All incubators must accomplish the following tasks:
- They must maintain temperature: Chicken eggs need to be kept at 99.5 degrees at all times. Just a single degree too high or too low for as little as a couple of hours can kill the developing embryo. A good incubator will hold a steady temperature with minimal fluctuations.
- They must provide good humidity: During the first 18 days of incubating your chicken eggs, you must keep humidity between 40 and 50 percent. In the final days before hatching, you will need 65 to 75 percent humidity. The best incubators have easy-to-use compartments so you can fill them with water without having to open the incubator door.
- They must provide good ventilation: Did you know that chicken eggs are actually porous? They allow oxygen to enter the developing chick and carbon dioxide to exit. An incubator will need to have vents that will allow fresh air inside so that your developing chicks are able to breathe inside the egg.
As previously mentioned, if you’re interested in making a homemade incubator, you can do using an insulated box like a Styrofoam cooler.
Add a light bulb on a dimmer switch to be the heat source and put a pan of water with a sponge in it to humidify the air.
These will require a lot of work, as you will have to check on them constantly. However, if you’re really trying to save some money, it’s worth a shot.
Invest in Other Incubation Tools
Your shopping list doesn’t end there. In addition to the incubator, you will also want to purchase a high-quality hygrometer (which measures humidity) and a thermometer.
Even if you decide to try to save some money by building a homemade incubator, don’t cut corners and purchase cheap measurement tools.
These will not be accurate enough.
You can purchase a combination thermometer/hygrometer that has an external display – these are designed specifically for this task.
Finally, some incubators come with automatic egg turners.
You can also purchase these separately. For the amount of money involved, an automatic egg turner is well worth it.
When a hen sits on her eggs, a lot of her work stems from a natural instinct to move her eggs. The eggs need to be turned to help the embryo develop appropriately.
The best chicken egg incubators have built-in turning devices, but you can also purchase stand-alone egg turners to help you do the job.
Otherwise, you will need to turn your eggs at least three times a day – or to be truly effective, once on the hour.
Set Up Your Incubator
Once you have your equipment assembled, you can go ahead and set up your incubator.
Assemble it according to the instructions on your specific device – but know that most incubators come fully assembled.
You will want to put your incubator in a location where it will experience the fewest fluctuations in humidity and temperature.
That means no placing your incubator in a sunny window!
A basement might work, but you should avoid placing it on the floor, where it will experience drafts and low ambient temperatures.
In some cases, a closet in an infrequently-used room can do the trick.
Find Some Fertile Eggs
If you already have a flock of chickens with a rooster, this part will be easy – most of the eggs you collect are already fertile.
Collect the eggs as soon as possible after they are laid. In fact, if you plan to hatch your own chicken eggs, you should try to collect eggs twice or three times a day – more during the summer or winter months, when eggs are more likely to spoil or freeze.
If you don’t have chickens of your own, you can purchase them from a friend or a nearby farmer.
Often, websites like Craigslist will connect you with people who have hatching eggs for sale.
In some cases, you may also be able to buy fertile hatching eggs from hatchery, feed stores, or other suppliers.
This is particularly useful if you are hoping to hatch a rare breed of chicken that is more difficult to find in your local area.
Just remember that you will want to stay as close to home as possible.
It can be tough to mail fertile hatching eggs – even those that left the coop fresh and ready to be hatched will undergo some serious stress in their journey to you.
The jostling motions and the fluctuations in humidity and temperature while in transit can often kill the developing fetus.
When you are selecting eggs to be hatched, regardless of the origins, try to choose those that are clean, full-sized, and well-formed.
Do not wash the eggs.
They are covered in a natural coating, known as bloom, that your embryo needs to have in order to stay protected from bacteria.
If you can’t get your eggs in the incubator right away, store them in egg cartons at temperatures between 50 and 60 degrees.
Make sure they stay at around 75 percent humidity, too. You can wait for up to ten days without ruining your success at hatching, but know that fertility will decline incrementally every day.
When you store your eggs, make sure they are stored in the carton with the fat side pointed up -this will help keep the embryo alive.
Incubate Your Eggs
Now comes the fun part – getting ready to incubate!
When you are ready to incubate your eggs, you will want to make sure your incubator is perfectly calibrated first.
Turn it on at least a day before you place your eggs into it, monitoring it for consistent temperatures and humidity readings.
You will want to make adjustments to ensure that it is ideal.
If your incubator is not remaining consistent for whatever reason, do your best to figure out the potential cause and don’t insert your eggs until you know what the problem is.
It’s better to tinker with an empty incubator than it is to play with one that is filled with eggs.
Now, load your eggs!
You should provide a bit of space between them to make sure they have plenty of breathing room.
As long as you aren’t overloading your incubator past the capacity listed for your specific brand of incubator, you should be just fine.
Place the eggs on their side, close the door, and check the levels everyday to make sure the temperature and humidity are staying the same.
You will need to add water every other day in most cases to keep humidity consistent.
It’s especially important that you remember to add water on day 18 to increase the humidity to the levels needed for hatching.
If your incubator did not come with a turner, you will need to follow the procedures detailed below to make sure your eggs are turned properly:
- Draw an x on one side of the egg and an O on the other – this will let you know which eggs you have already turned.
- Three times a day (ideally more), you should turn the eggs gently. Make sure the number of times per day that you turn your eggs is odd so your eggs are never resting on the same side two nights in a row. Vary the positioning as much as possible.
- Turn as often as possible until day 18, and then avoid turning for the last few days.
Prepare for Hatching

We said incubating chicken eggs was the fun part, but we lied – now comes the really fun part. Watching your chickens hatch!
You might notice some movement (or even hear some quiet peeping!) from your eggs during the last few days before hatching. The eggs might shift around as the embryo become more active.
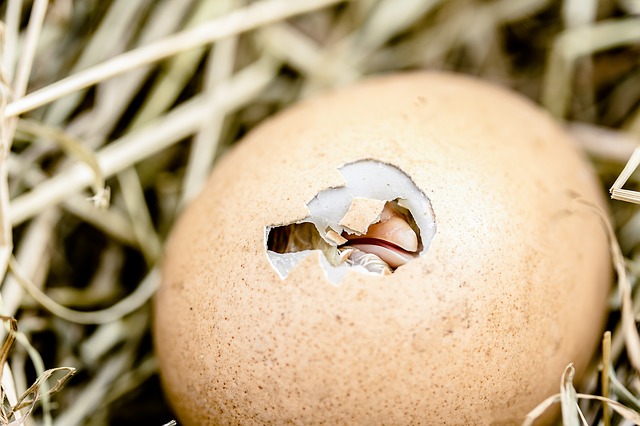
Eventually, your chicks will begin a process known as peeping.
They will peck a tiny hole in the egg and take their first breaths of outside air.
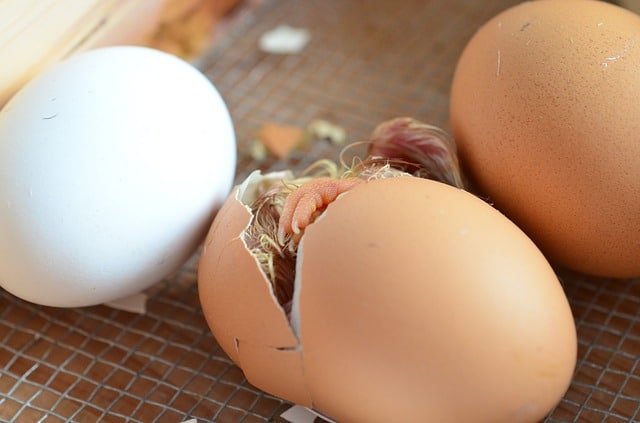
Then, they will start “unzipping” themselves out of the egg. This can take a long time for them to do – be patient!
Your chicks will sometimes rest for as long as 12 hours at a time to let its lungs adjust to the hatching process.
Do not, under any circumstances, help your chick out of the shell. This is a natural process that requires no human interference.
In very rare cases, your chick might struggle from a health condition that requires you to help it out of the shell, but this is a very delicate and difficult thing to do, and it’s not recommended that people who are new to hatching chicks give it a try.
It’s almost always better to let your chicken eggs hatch on their own than to try to interfere.
You can cause injury and kill your chick in the process.
Let nature take its course, and once the chick is free from the egg, you should let it remain in the incubator until it has dried up and fluffed out.
In fact, it’s recommended that you do not open the lid of your incubator at all while your chicks are hatching.
This can cause a drop in temperature and humidity which will make it more difficult for your remaining birds to make their way out.
Instead, wait until the hatching has completed (it can take as much as a day or more) and then move your fluffy little birds to the brooder, where they will spend the first few weeks of life.
Caring For Your Chicks After They Have Hatched
Your work isn’t over after your adorable, fluffy little chicks have hatched!
Next, you need to move them to a brooder where they will remain for the first couple of months of their lives.
Here is the basic equipment that your chicks need to stay happy and healthy
Brooder
Your chicks need a secure brooder to prevent your chicks from becoming trapped or from escaping.
You also need to make sure other creatures – like rodents or the household dog – stay out.
The brooder should be draft proof and have good ventilation, and it also needs to be dry, as young chicks who become wet can die quickly.
Make sure the floor of the brooder is something on which your chicks can easily walk. Plastic is too slippery and wire can cause foot problems.
Use a bedding material like wood shavings to give them a soft place to sleep, but keep in mind that you might want to put down a larger material, like paper towels, during the first few weeks that they are in the incubator.
The large shavings can cause some health problems related to the chicks’ delicate respiratory system.
Heating System
Your chicks need to be extremely warm during the first few days of life – think just under 100 degrees.
You can lower the temperature by five degrees each week until the chicks are about 10 weeks old.
At this point, depending on your climate, you will probably be ready to send the birds to live outside.
You can use a heat lamp, an infrared heater, or a heating panel to warm your chicks.
Heat lamps are one of the most common mechanisms used to keep chicks warm, but they can be unsafe.
Food and Water
Like all living things, your baby chicks will need plenty of clean, freshwater and nutritious food.
Start off which a chick starter, which will have all the protein, vitamins, and minerals your chicks need to stay healthy.
You can choose between medicated and non-medicated feed.
That’s all you need to know to successfully incubate and hatch your own chicken eggs!
If you’re nervous about your first time attempting this exciting pursuit, it may be worth it to start off with just a few eggs.
This way, you can figure out the process by trial and error so that you have the best chances for success.
